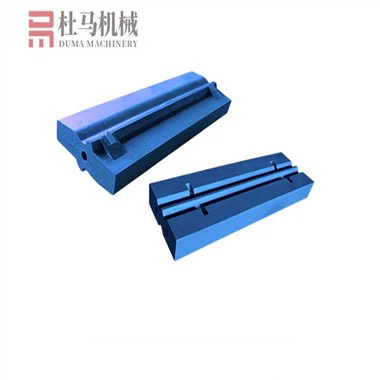
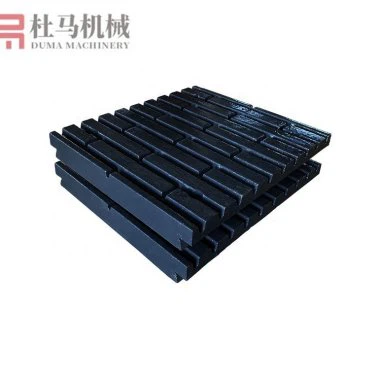
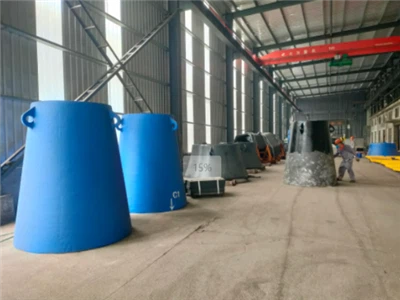
As an ISO 9001:2015 certified manufacturer with a 42,000 m² heavy-duty foundry, DUMA provides high-precision Gyratory Crusher Upper Mantles engineered for seamless integration. Proper installation is critical to activating our material's work-hardening properties (exceeding HB500) and maximizing the equipment's Total Cost of Ownership (TCO).. A gyratory crusher upper mantle is a key part of the crushing equipment, and proper installation is essential for its optimal performance and longevity. In this blog, I will walk you through the step - by - step installation process of a Gyratory Crusher Upper Mantle.

Step 1: Preparation
Before starting the installation, it is crucial to ensure that all necessary tools and equipment are ready. You will need a crane or hoist for lifting the upper mantle, a torque wrench for tightening bolts, and a set of measuring tools such as a caliper to check the dimensions. Also, make sure the work area is clean and free from any debris that could interfere with the installation.
Inspect the upper mantle thoroughly for any damage or defects. Check the surface for cracks, chips, or uneven wear. Refer to the product manual provided by the manufacturer, which can be found on our website Mantle And Liners For Gyratory Crusher. This manual contains detailed specifications and guidelines for the installation.
Step 2: Remove the Old Upper Mantle
If there is an existing upper mantle in the gyratory crusher, it needs to be removed first. Disconnect any electrical or hydraulic connections associated with the crusher. Use the crane or hoist to lift the old upper mantle carefully. Make sure to follow all safety procedures during this process.
Once the old mantle is lifted, clean the mounting surface of the crusher. Remove any dirt, grease, or old adhesive from the surface. A clean mounting surface is essential for a proper fit of the new upper mantle.
Step 3: Check the Crusher Shaft and Bushing
Inspect the crusher shaft and bushing for wear and damage. The shaft should be straight and free from any signs of corrosion or pitting. The bushing should fit snugly around the shaft. If there are any issues with the shaft or bushing, they should be repaired or replaced before installing the new upper mantle.
Measure the dimensions of the shaft and bushing to ensure they are within the specified tolerances. This information can also be found in the product manual.
Step 4: Prepare the New Upper Mantle
During inspection, ensure the Austenitic structure of the mounting surface is free from carbide precipitation. DUMA recommends applying a specialized anti-seize compound to our Mn18Cr2/Mn22Cr2 components to facilitate future removals while maintaining the structural integrity of the high-manganese interface. This will prevent the mantle from sticking to the crusher shaft and make future removal easier.
Check the alignment marks on the upper mantle. These marks are crucial for proper alignment during installation. Make sure the mantle is oriented correctly according to the alignment marks.
Step 5: Lift and Position the Upper Mantle
Use the crane or hoist to lift the new upper mantle and position it over the crusher shaft. Leveraging a database of over 4,000 patterns, DUMA ensures our upper mantles provide precise fit accuracy that eliminates the need for on-site grinding. Use a feeler gauge to ensure the clearance is uniform; any deviation can cause localized stress concentrations, leading to premature brittle fracture.
Once the mantle is in position, check the clearance between the mantle and the crusher frame. The clearance should be uniform around the circumference. Use a feeler gauge to measure the clearance at multiple points.
Step 6: Tighten the Bolts
The bolts that secure the upper mantle to the crusher must be tightened to the correct torque specification. Use a torque wrench to ensure accurate tightening. Refer to the product manual for the specific torque values.
Tighten the bolts in a criss - cross pattern to ensure even distribution of the clamping force. This will prevent the mantle from shifting during operation.
Step 7: Check the Installation
After tightening the bolts, perform a final inspection of the installation. Check the alignment of the upper mantle again to make sure it is still correct. Also, check the tightness of the bolts.
Run a test operation of the gyratory crusher at a low speed. Listen for any unusual noises or vibrations. If there are any issues, stop the crusher immediately and check the installation.
Step 8: Maintenance and Follow - up
Regular maintenance is essential for the proper functioning of the gyratory crusher upper mantle. Inspect the mantle regularly for wear and damage. Replace the mantle when it reaches the end of its service life.
We also offer a wide range of Gyratory Crusher Spare Parts to ensure the continuous operation of your crusher. Our parts are of high quality and are designed to fit your specific crusher model.
If you are in the market for a Gyratory Crusher Upper Mantle or other related parts, we are here to help. Our team of experts can provide you with detailed information and guidance on the installation process. We also offer Gyratory Crusher Liner And Mantle For Crushing Plants that are suitable for various crushing applications.
If you have any questions or would like to discuss your specific requirements, please feel free to reach out. We are eager to assist you in finding the right solutions for your crushing needs.

References
- Manufacturer's product manual for Gyratory Crusher Upper Mantle.
- Industry standards and guidelines for gyratory crusher installation and maintenance.